
Before attempting to join a client:
- Domain Controller Availability: Ensure the DC is online and reachable from client machine.
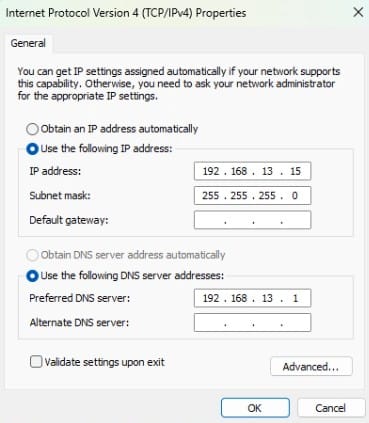
- Network Connectivity: Client must be able to resolve the domain name to IP via DNS.
- DNS Configuration: Point client DNS to the domain controller’s IP or DNS IP.

- Domain Credentials: Have a domain user account with permission to join computers.
- Computer Name: Assign a meaningful hostname to client machine before joining.
If you’d like to watch a step‑by‑step walkthrough of these steps, please visit our YouTube Video.
Steps:
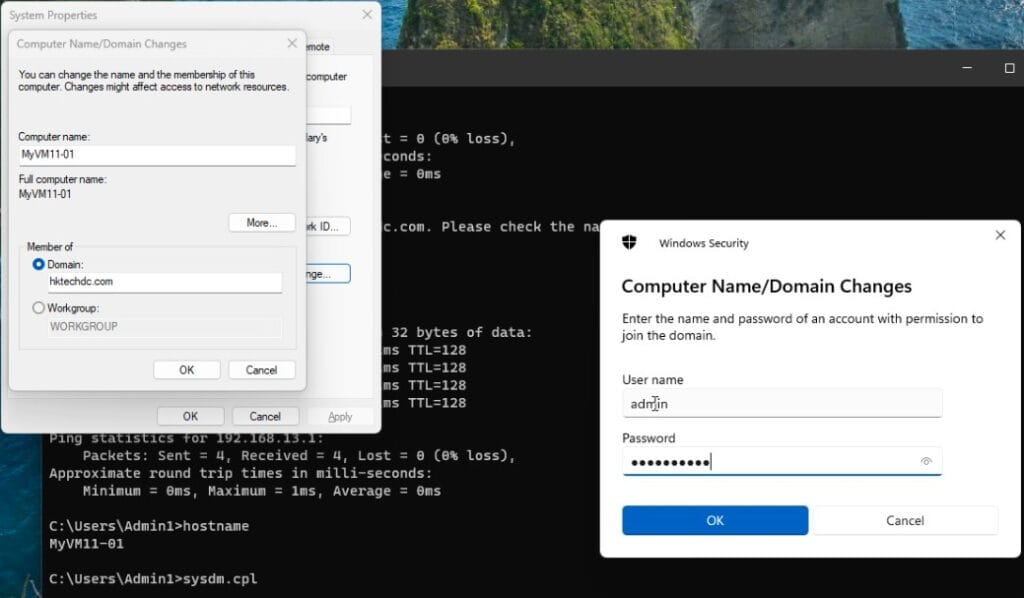
- Press Win + R → sysdm.cpl → Enter.
- In System Properties, go to the Computer Name tab.
- Click Change → Select Domain.
- Enter the domain name (e.g.,
xyz.com). - Provide domain credentials when prompted.

- Restart the computer to apply changes.
- After restart you can login with domain user account on this machine.
This is the most common and user-friendly method for administrators.
You can join a domain using the netdom command:
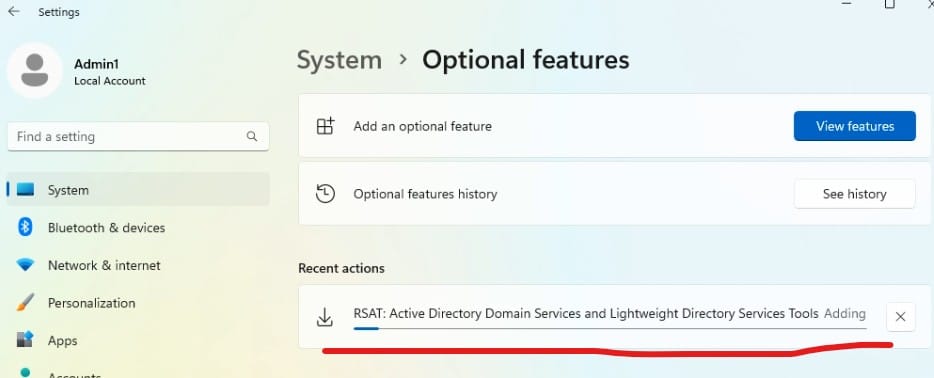
- For netdom command to work, we need to install optional feature RSAT: Active Directory Domain Services and Lightweight Directory Services first on client machine.
- To install the RSAT tool → Open Settings → Search Optional Feature → Add Feature → Search RSAT and add above feature.

- This feature will take some time for installation and an internet connection may be required.
- Open Command Prompt with Run as Administrator and run the below command to join the domain.
netdom join %computername% /domain:xyz.com /userd:domainuser /passwordd:*
%computername%→ Current client/computer name.xyz.com→ Your Domain name.domainuser→ Domain user account name with join rights./passwordd:*→ Prompts for domain user’s password securely.
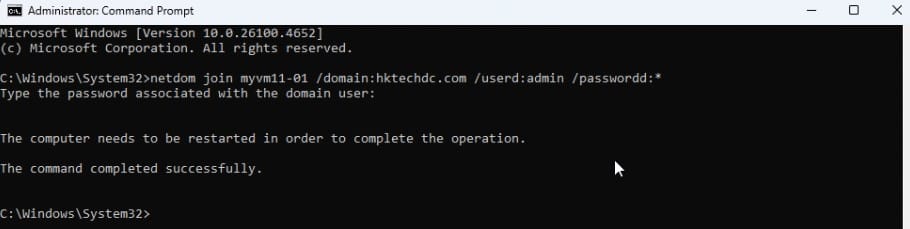
Restart the computer after successful execution. After restarting you can login with domain user account.
Add-Computercmdlet joins the client to the domain.-Credentialprompts for domain credentials.-Restartreboots automatically after joining.
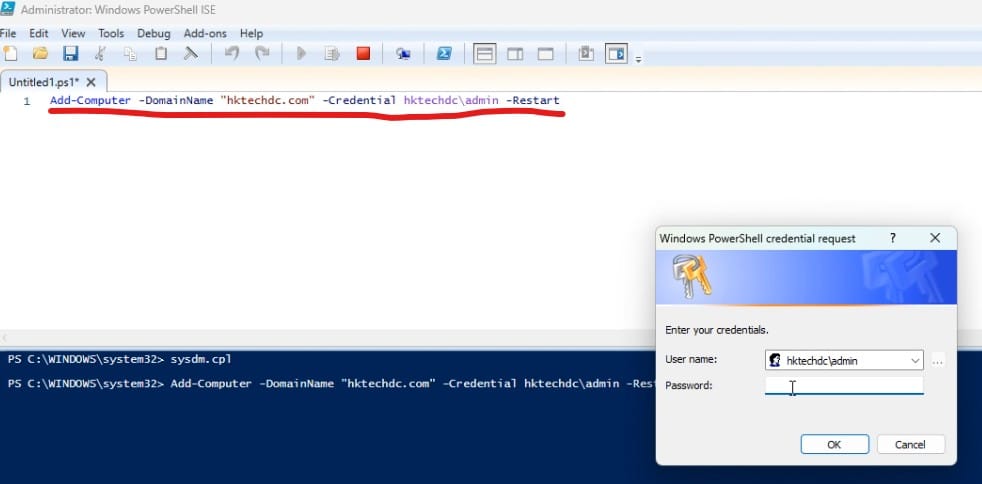
This method is ideal for automation across multiple clients.
Steps:
- Open Settings → Accounts → Access work or school.
- Click Connect → Select Join this device to a local Active Directory domain.

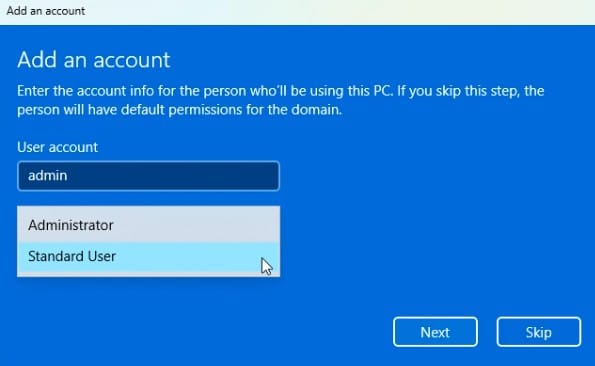
- Enter domain name and credentials.

- Select the Account Type as per your requirement or Org Policy.

- Restart the computer.

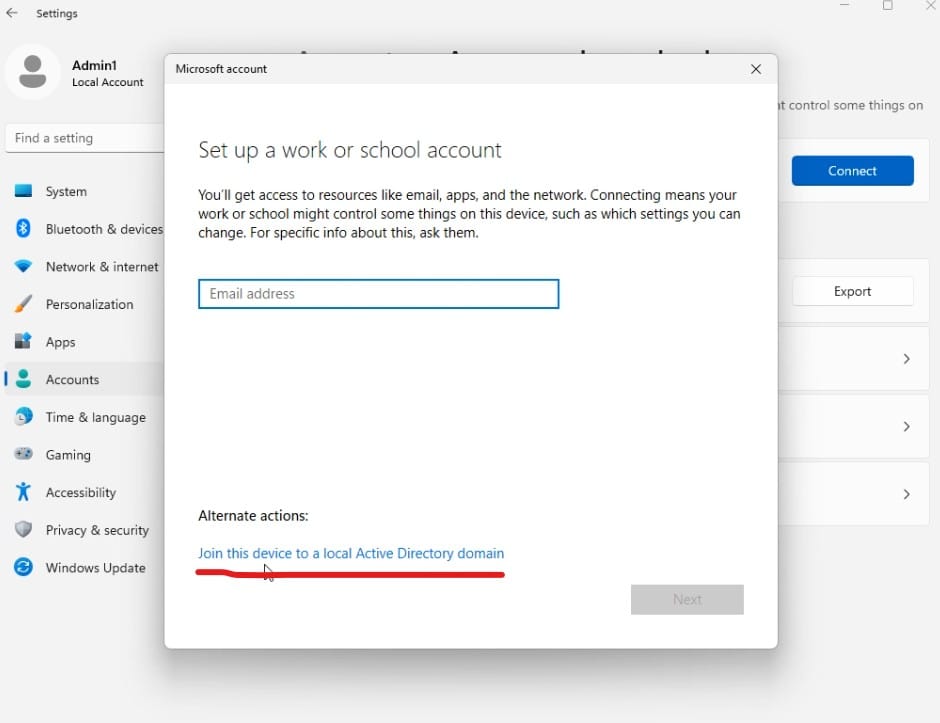


This is the modern GUI method for Windows 10/11 clients.
After reboot, verify domain join:
- Log in the client with domain credentials (
xyz\username). - Run
whoami→ Should display domain\username.
- Run
ipconfig /all→ DNS should point to domain controller or DNS. - Open Active Directory Users and Computers (dsa.msc) on DC → Confirm computer object is created under Computers OU.
- Log in the client with domain credentials (