
In our previous post, we created a virtual machine and installed the Ubuntu Server OS. Now, we’ll extend its networking capabilities by adding two network adapters: one for internet connectivity and another for private/internal communication.
Steps to Add Network Adapters
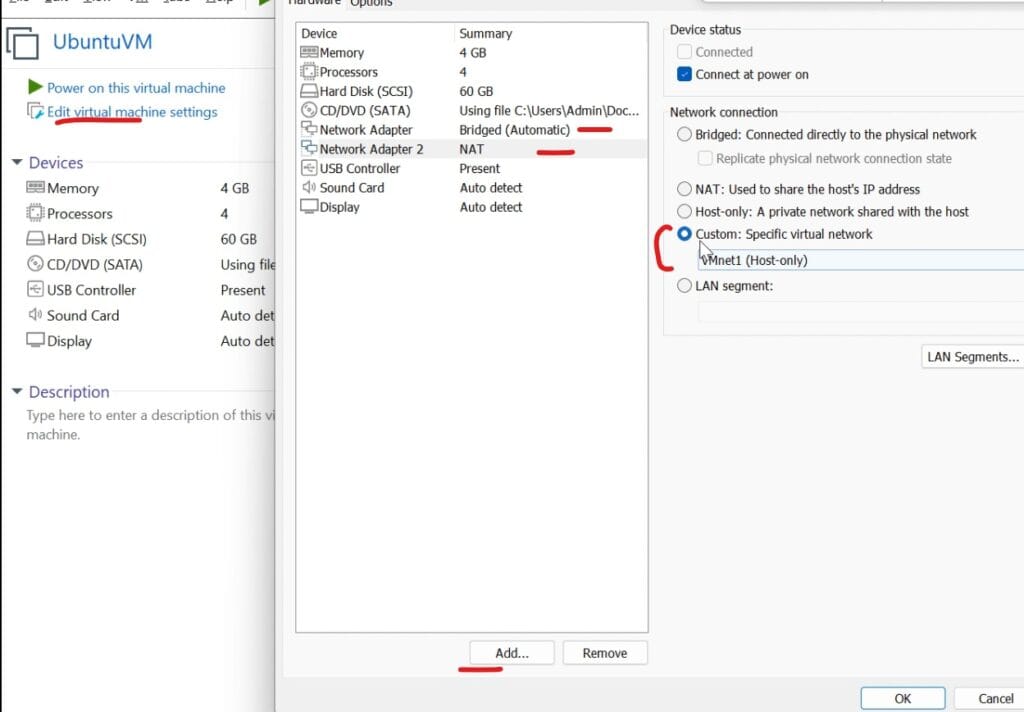
- Edit VM Settings.
- Add Two Network Adapters.
- Click Add → Network Adapter → OK
- Configure the Adapters.
- Adapter 1 (Internet Access): Set to Bridge Mode. This allows the VM to connect directly to your physical network and access the internet.
- Adapter 2 (Private Network): Set to Custom or Host‑Only. This creates an isolated virtual network for internal communication between VMs and Host.
- Confirm the settings and click OK.

With the adapters added, you’re ready to start the VM and configure the network interfaces inside Ubuntu. This will involve assigning IP addresses, setting up routes, and ensuring both internet and private connectivity work seamlessly. If you’d like to watch a step‑by‑step walkthrough of these steps, please visit our YouTube Video.
Before making changes, identify your network devices and their names. Knowing the correct interface name is crucial before applying configurations.
- Run the following command to list all physical network adapters:
- Command: – sudo lshw -class network
- This will display details of all available network interfaces. At this stage, you’ll notice that both Ethernet interfaces are in a disabled state.
- Ubuntu assigned names like ens36 or ens37 to ethernet interfaces.

- ensXX → Ethernet interface with a system‑assigned identifier.
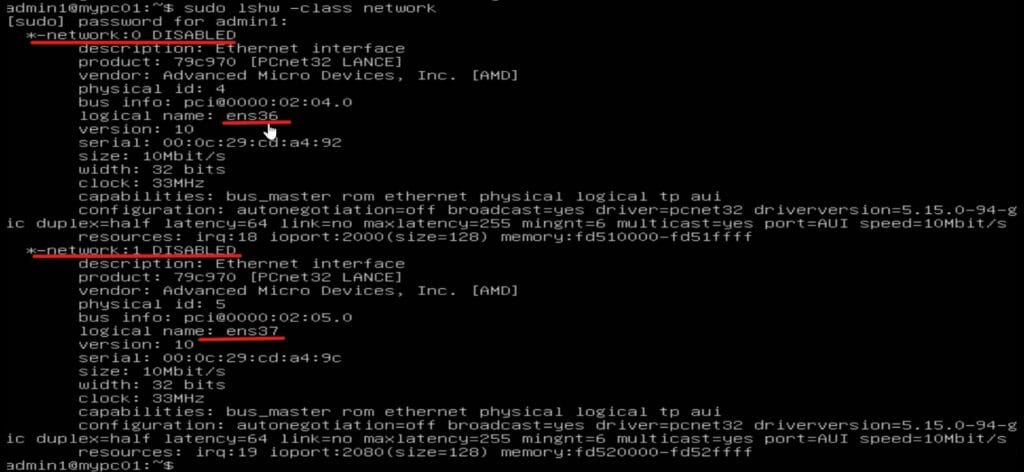
Knowing these names ensures you apply the correct configuration to the right adapter.
As we’ve seen, both network adapters are initially in a disabled state. We’ll enable them temporarily and apply test configurations. These settings will be lost after a reboot, but temporary settings are useful for testing network or troubleshooting.
- Set Ethernet State.
- sudo ip link set dev ens36 up (Use up to enable, ens36 is the interface name).
- sudo ip link set dev ens36 down (Use down to disable, ens36 is the interface name).
- Ethernet interface is enabled now but there is no IPv4 address on Bridge network.

- Renew IP via DHCP.
- sudo dhclient ens36 (ens36 is the interface name).
- This requests a fresh IP address from the DHCP server for the specified interface.
- Check IP and Interface Details.
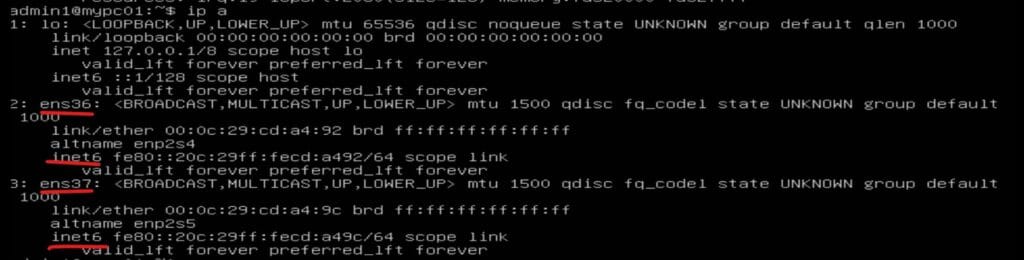
- ip a – shows all interfaces and their IPs.
- ethtool ens36 – provides detailed hardware information.
- ip address show dev ens36 – displays IP details for a specific interface.

- IPv4 is assigned now, you can test the internet connectivity.
- Ping -c 4 google.com (“-c 4” to send 4 ICMP packets).

- Ping -c 4 google.com (“-c 4” to send 4 ICMP packets).
- Assign a Temporary Static IP to Secondary ethernet interface (ens37).
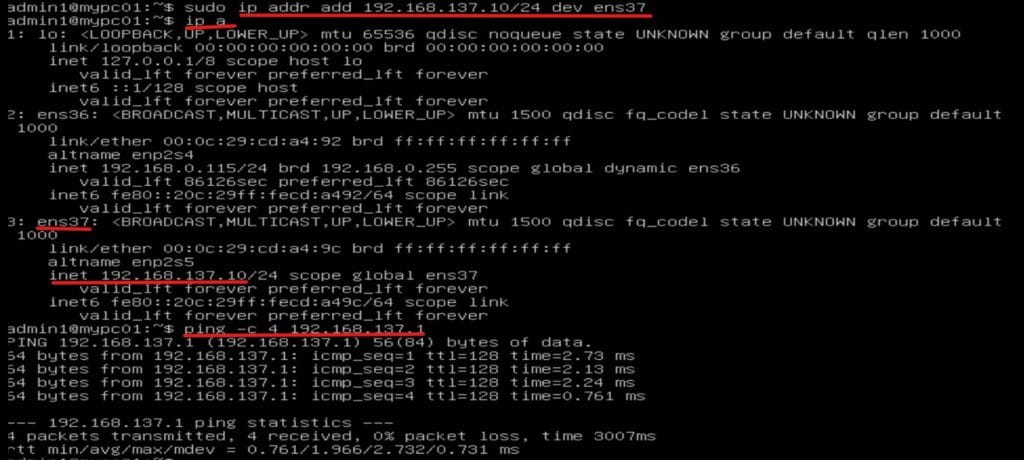
- sudo ip addr add 192.168.137.10/24 dev ens37
- This assigns a temporary static IP (192.168.137.10) to ens37.
- Check the status and connectivity with Host via Private VNet. (ping -c 4 192.168.137.1).

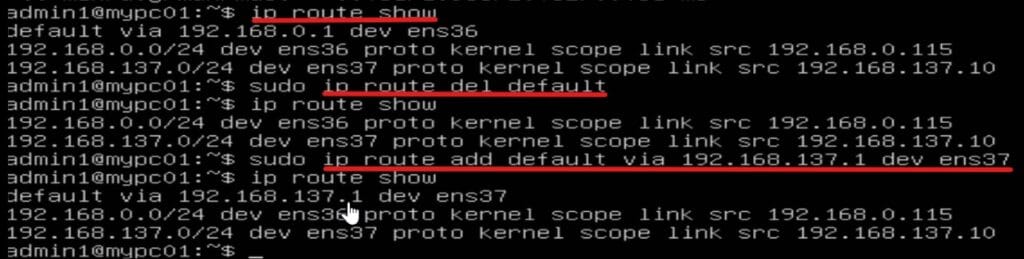
- View and Configure Routes or Gateway IP if required.
- ip route show – This lists current routes/gateways.
- sudo ip route del default – To delete current routes.
- sudo ip route add default via 192.168.137.1 dev ens37 – Add default gateways as needed, here gateway IP is 192.168.137.1 and ens37 is the interface name.

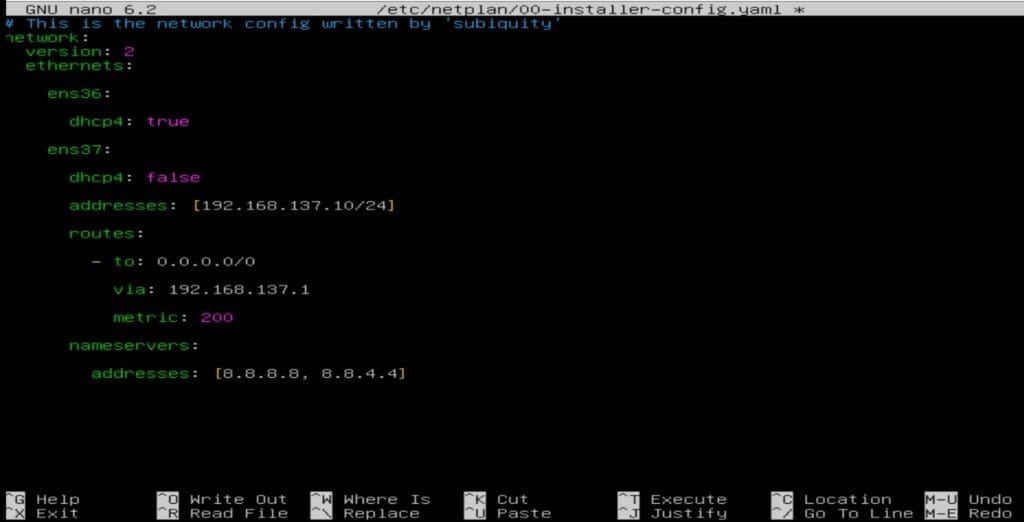
- Set Ethernet State.


- In the above config file, ens36 → uses DHCP for automatic IP assignment.
- ens37 → has a static IP, gateway, and DNS servers defined.
- Routes and nameservers can be customized or removed as per requirement.

- Save the config file.
- Press Ctrl+X key → Press Y for confirm
- Press Enter with same name.
- Apply NetPlan changes.
- sudo netplan apply
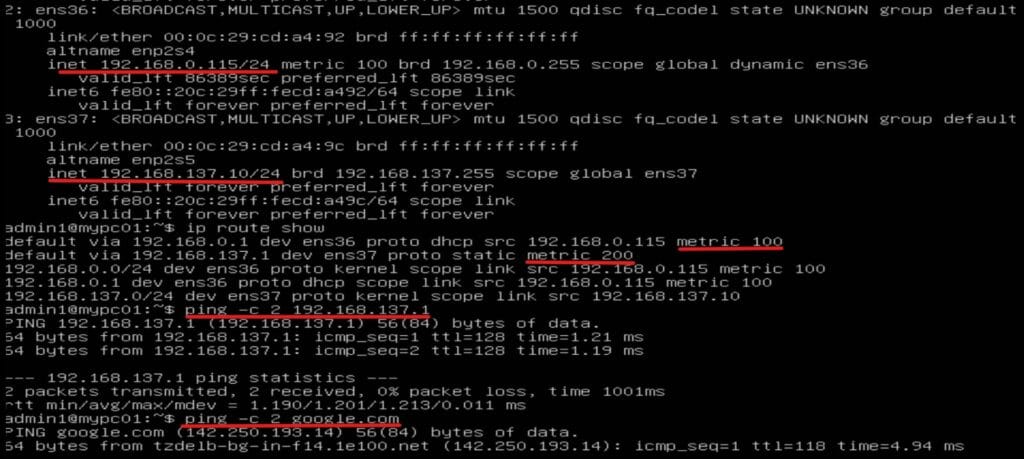
- Verify the Network configuration.
- ip a
- Reboot and verify configuration.
- ip a
- ip route show
- ping -c 2 google.com
- ping -c 2 192.168.137.1

With these steps, your Ubuntu server’s network configuration is complete. You now have both temporary commands for quick troubleshooting and permanent Netplan settings for production stability.
Pro Tip: Always test connectivity after applying changes and keep a backup of your Netplan configuration.
